Key Takeaways
- The Kindle Scribe lets you take notes whereas studying, together with highlighting textual content, leaving handwritten notes, and including sticky notes.
- You’ll be able to create notes inside eBooks and PDF recordsdata despatched to the Kindle Scribe utilizing the Ship to Kindle function.
- Notes will be seen, edited, and exported, and will be typed utilizing the on-screen keyboard as a substitute of writing with a pen.
At its core, the Kindle Scribe is a really massive Kindle that places hundreds of books right into a small, tablet-like system that you could take wherever. Even when you purchased a Scribe to make use of as a digital notebook, which is why it has a ten.2-inch show and comes with a stylus for writing on the display screen, odds are you will end up studying a guide or reviewing paperwork on the Scribe. However about notes?
8:05
![]()

Amazon Kindle Scribe tips and tricks: 14 must-try features
In case you’ve obtained your self the most important Kindle and a pen, there’s lots value diving into to make the Scribe do extra for you.
Simply since you’re utilizing the Scribe to learn, doesn’t suggest you possibly can’t use it to take notes contained in the guide or doc in entrance of you. Gone are the times of highlighting an insightful line of textual content and making an attempt to recollect why you preferred it a lot. With the Scribe, you possibly can spotlight textual content, depart a handwritten be aware, or place a sticky be aware on a web page with just some faucets. Under, I am going to stroll you thru all of the other ways you should utilize the Kindle Scribes Notes function.
 The place can you utilize Notes on Kindle Scribe?
The Kindle Scribe’s Notes function is out there in any eBook or PDF file you have despatched to the system utilizing Amazon’s Send to Kindle function. In reality, the Ship to Kindle function is now constructed into Microsoft Phrase, making it simple to rapidly ship the doc you are engaged on on to your Scribe with simply a few clicks.
Whenever you’re studying a guide or doc, you will see a small round button with a finger pointing down and to the fitting. That icon inside the button signifies that your Pen, do you have to be utilizing it to faucet between pages or navigate, will probably be handled similar to your finger. Nevertheless, when you faucet on it, you will open the writing toolbar.
 Easy methods to create a be aware on Kindle Scribe
Open the writing toolbar
Whenever you open the writing toolbar, you will see a few choices. There’s the hand with the finger pointing down, indicating your Pen will not have any writing capabilities, after which there is a small sticky be aware button, together with a menu button.
To create a be aware inside a guide or doc in your Scribe, faucet on the button to increase the writing toolbar.
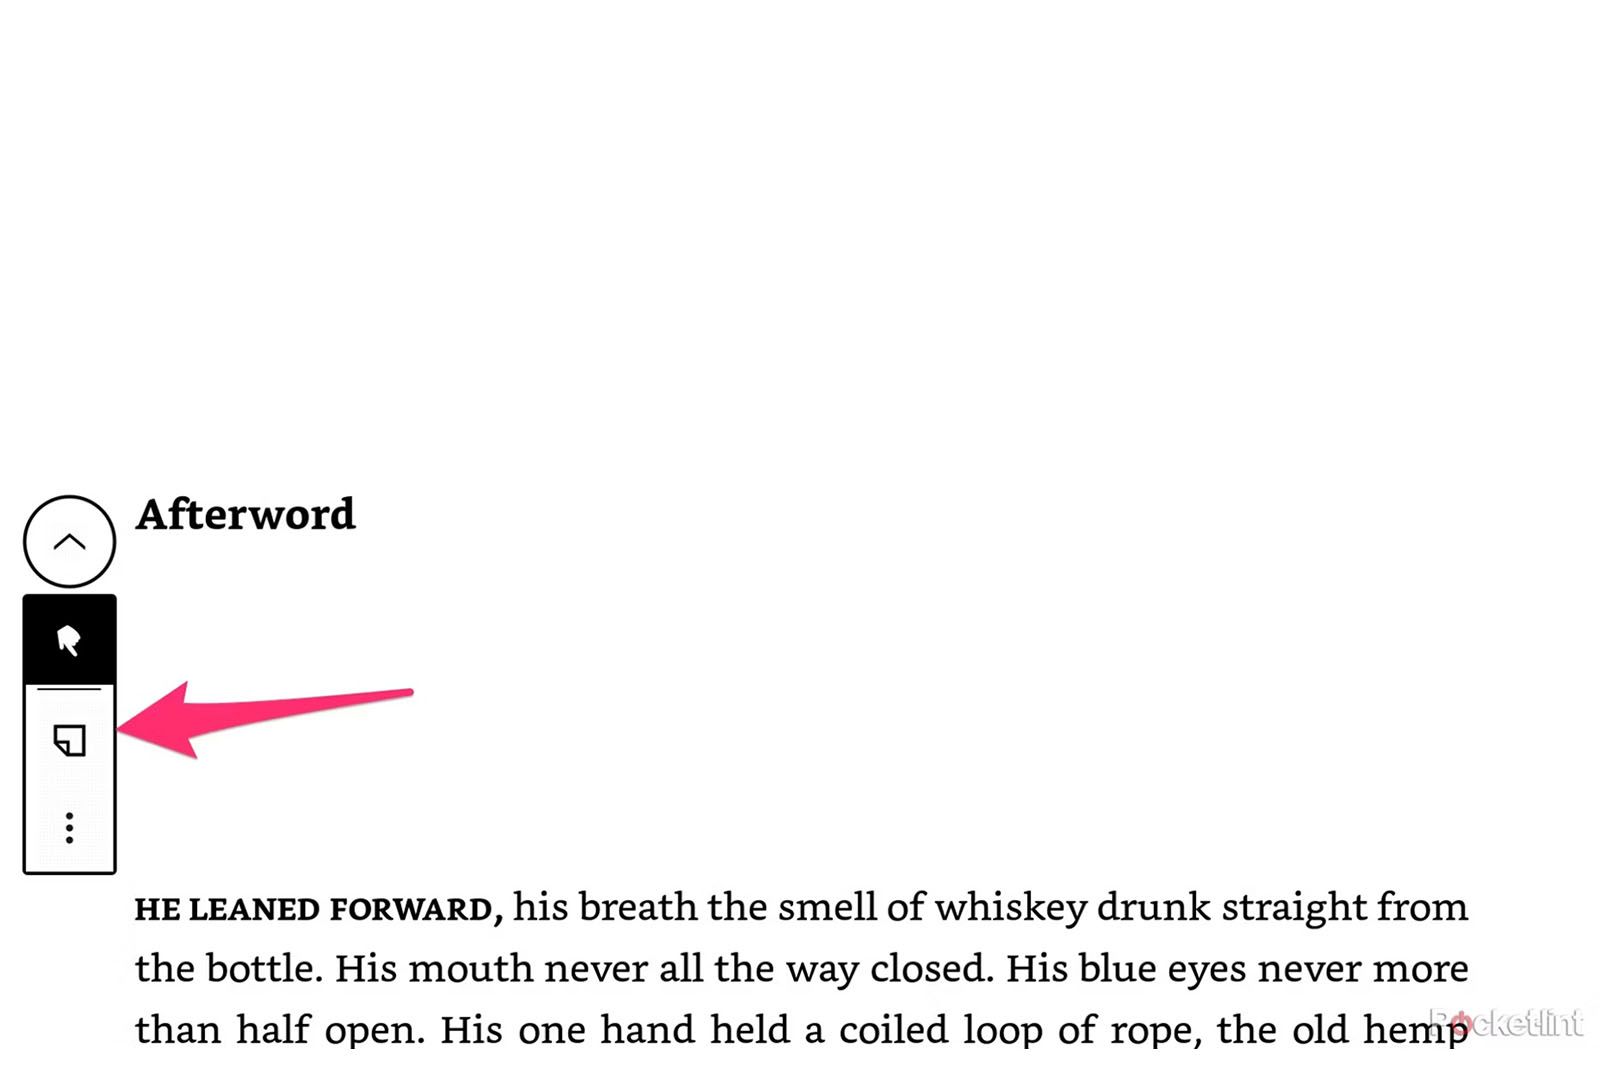
Faucet the sticky be aware icon
Subsequent, faucet on the sticky be aware icon. With the icon chosen, anytime you faucet on the Scribe’s show together with your finger or a Pen, a Sticky Notice icon will probably be positioned inside the textual content of the guide, and a window will present up, ready so that you can write in your ideas or concepts.
Transfer the be aware field
You can even faucet on the three-dot menu button to maneuver the be aware field to the highest of the underside of the display screen.
Auto-saving notes
As you write, you will see a saving indicator within the top-right nook, letting you realize that the be aware has been backed as much as your Amazon account. Whenever you’re completed writing, faucet on the X within the top-right nook of the display screen.
Edit your notes
You’ll be able to open any sticky be aware you see with a faucet to simply see what’s in it or add to it. When getting into a be aware, the writing toolbar expands to offer you extra instruments and pen types, similar to you have got entry to when taking notes in a pocket book.
 Easy methods to sort a be aware (as a substitute of utilizing the Pen)
Do not need to use the Pen to write down out a be aware? You should use the Scribe’s on-screen keyboard to sort it out when you’d want.
To take action:
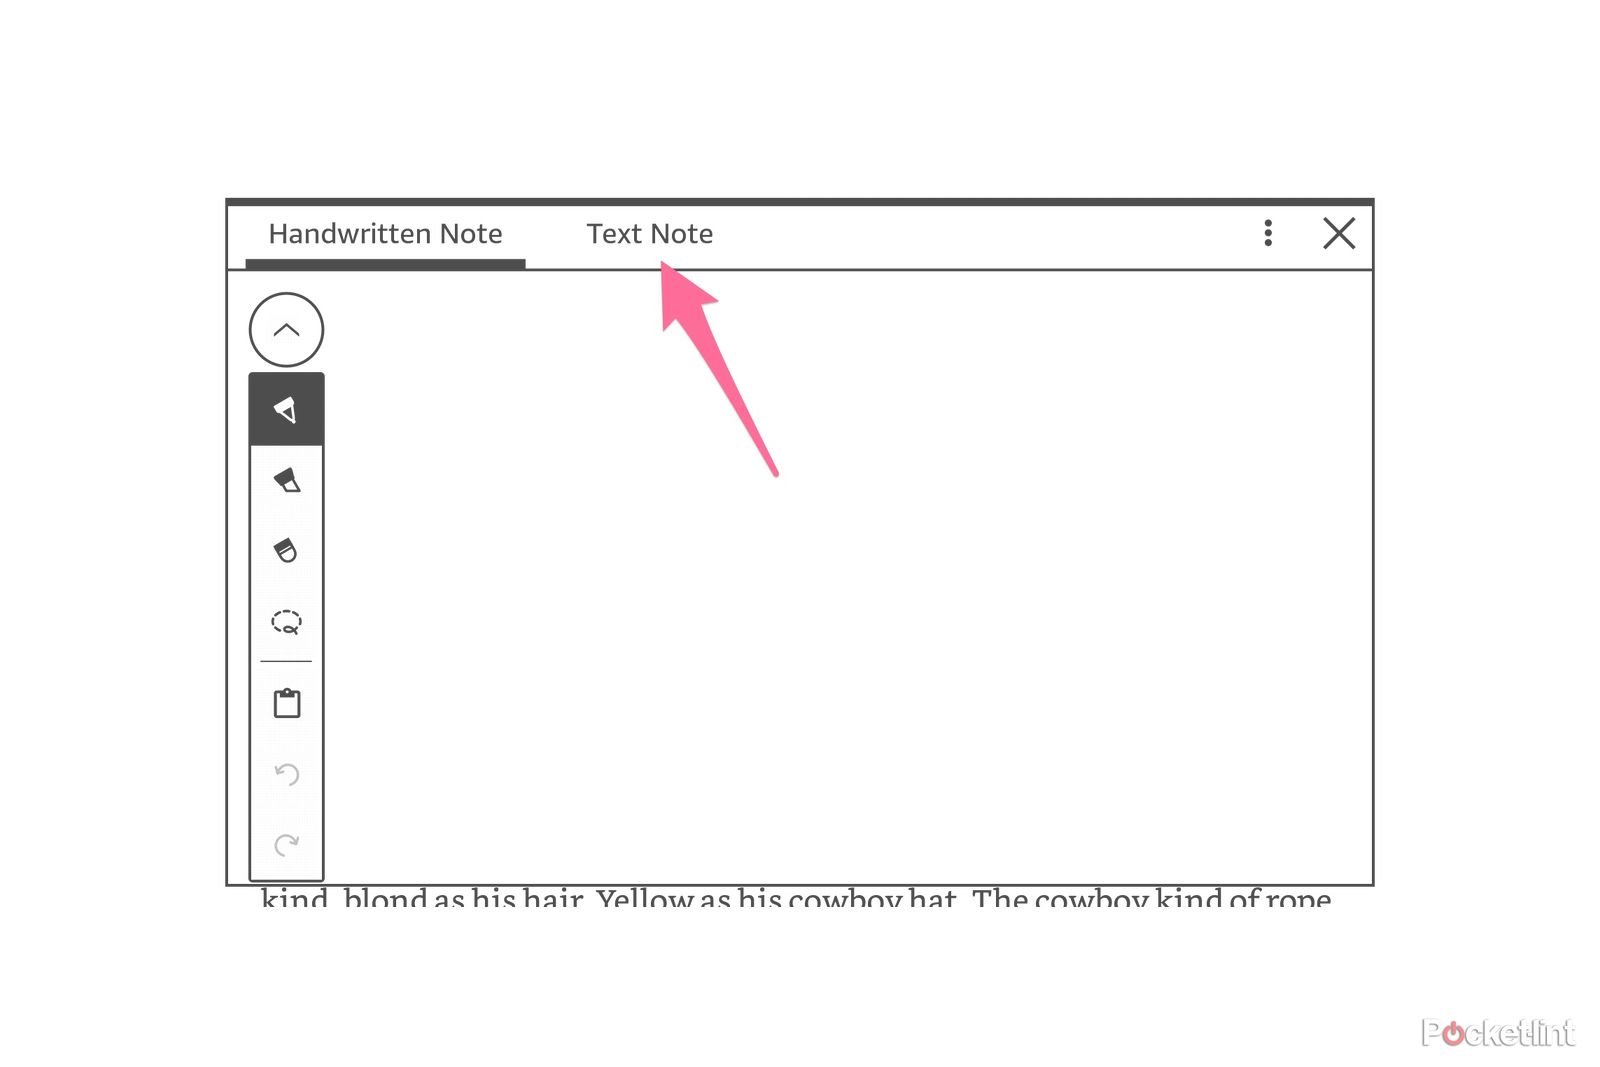
- You will want to pick the sticky be aware icon from the toolbar and contact the display screen together with your finger or Pen on the spot the place you need the be aware to be.
- When the Handwritten Notice field reveals up, as a substitute of writing inside it with the Pen, faucet on the Textual content Notice button on the high of the window.
- The underside of the display screen will show a digital keyboard that you could then use to sort a be aware.
- Whenever you’re completed, faucet on the X within the top-right nook.
Take note an e-ink show like what the Scribe makes use of would not have a tremendously quick refresh charge, so it could really feel like there’s numerous lag whereas typing; that is anticipated. You will simply have to sort slowly. Actual gradual.
 Easy methods to add a be aware to highlighted textual content
There’s one other approach so as to add a be aware to a guide; the method needs to be acquainted to any longtime Kindle consumer. In case you’ve ever highlighted any textual content in a Kindle guide, you are already a professional at utilizing this software. To begin:
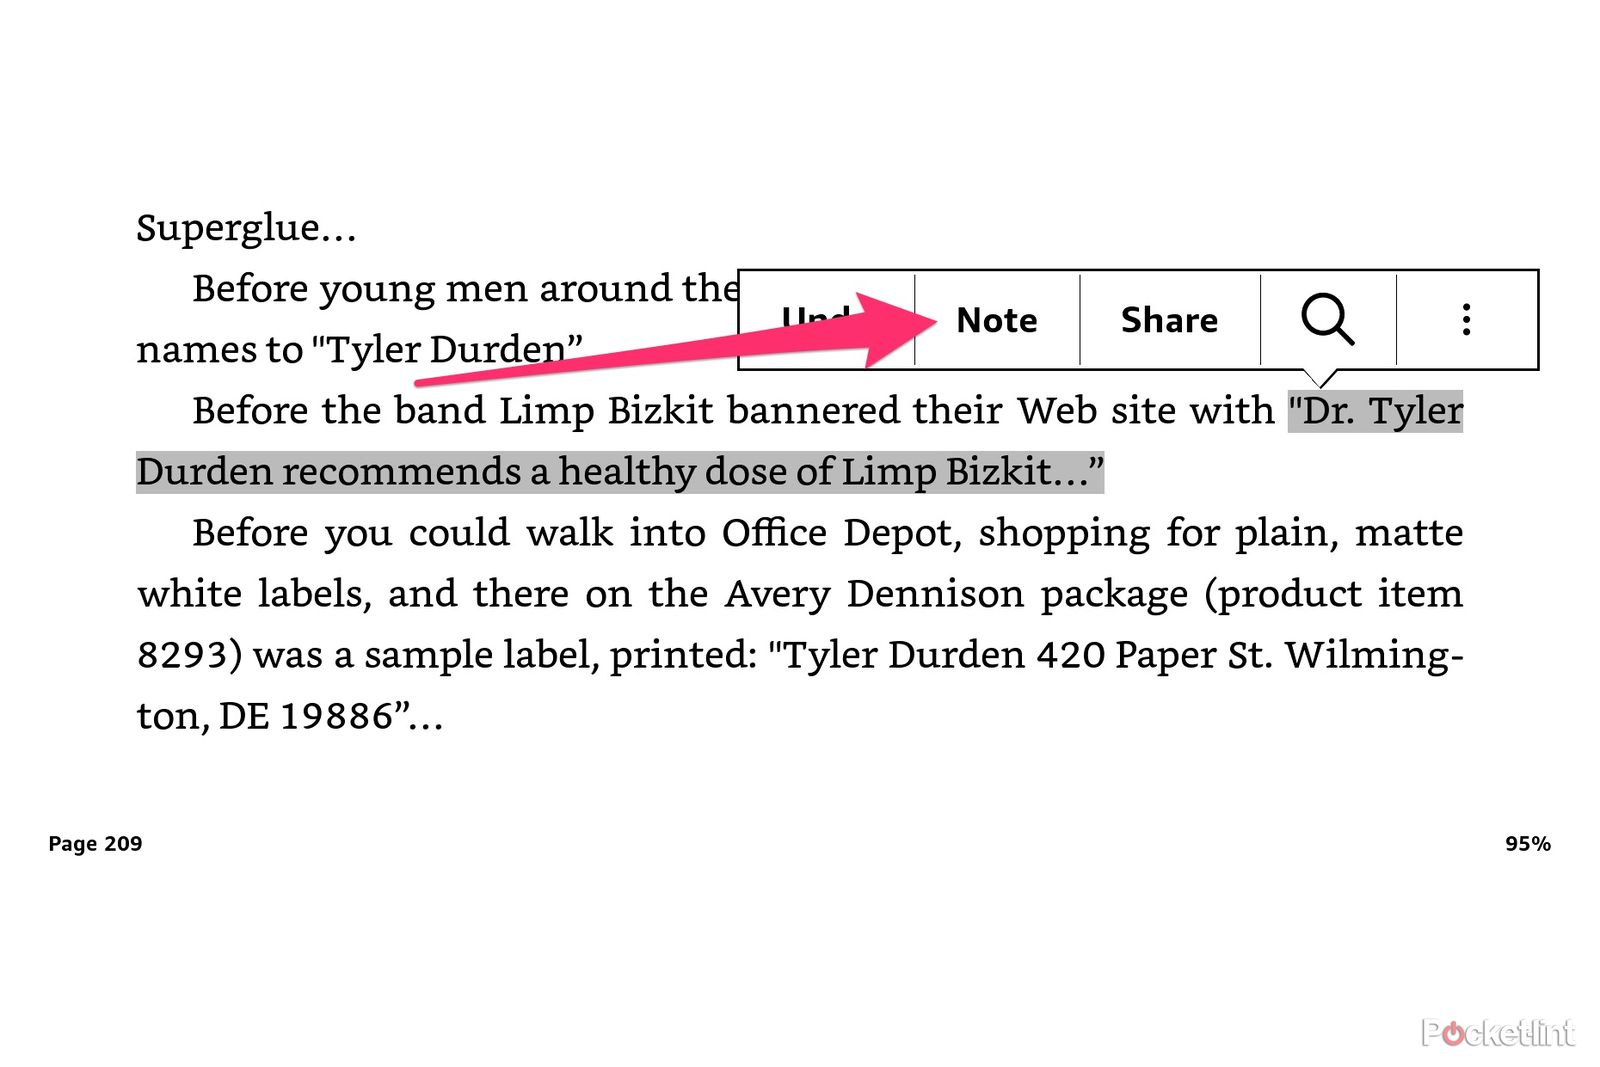
- Use your finger or the Pen (so long as Sticky Notice mode is not chosen) to spotlight textual content within the guide you are studying.
- Whenever you’re completed, you will see a small menu present up simply above the spotlight. One of many choices in that menu will probably be Notice; choose it.
- A handwritten be aware discipline will then present up, additionally supplying you with the choice to enter a Textual content Notice.
- Whenever you’re completed, faucet the X within the nook of the be aware window.

I get way more out of my Kindle Scribe’s pen with these 3 tricks
No matter whether or not you have got Primary Pen or Premium Pen for Scribe, you must know these three suggestions and methods to really get probably the most out of it.
Easy methods to view, export, or share your notes
Alright, you have learn an awesome guide, taken a ton of notes, and now it is time to return and mirror on what you discovered or particular moments within the guide. As an alternative of scrolling via every web page and searching for the small sticky be aware icon, you have got a couple of streamlined choices to rapidly view and export your notes.
Discover and look at your notes
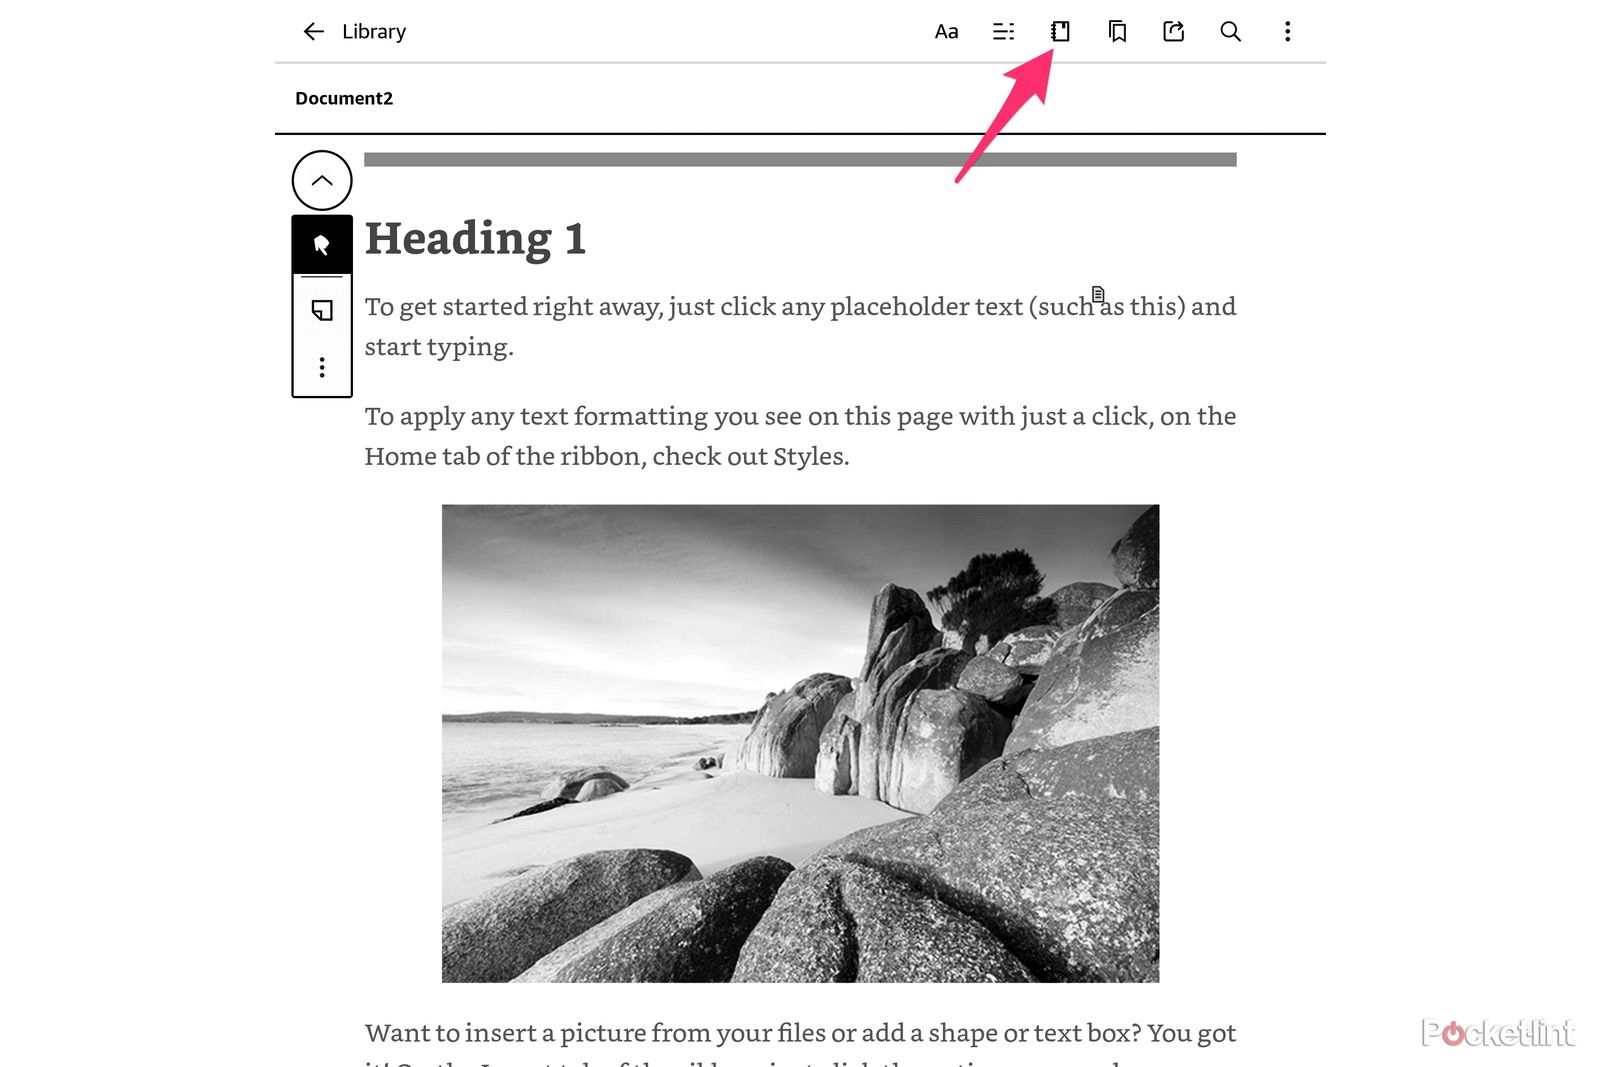
To view an inventory of notes, open the guide you left them in:
- Faucet on the highest portion of the display screen.
- A small menu will show with a number of icons.
- Discover and faucet on the icon that appears like a pocket book with a bookmark on it. It needs to be the third icon from the left.
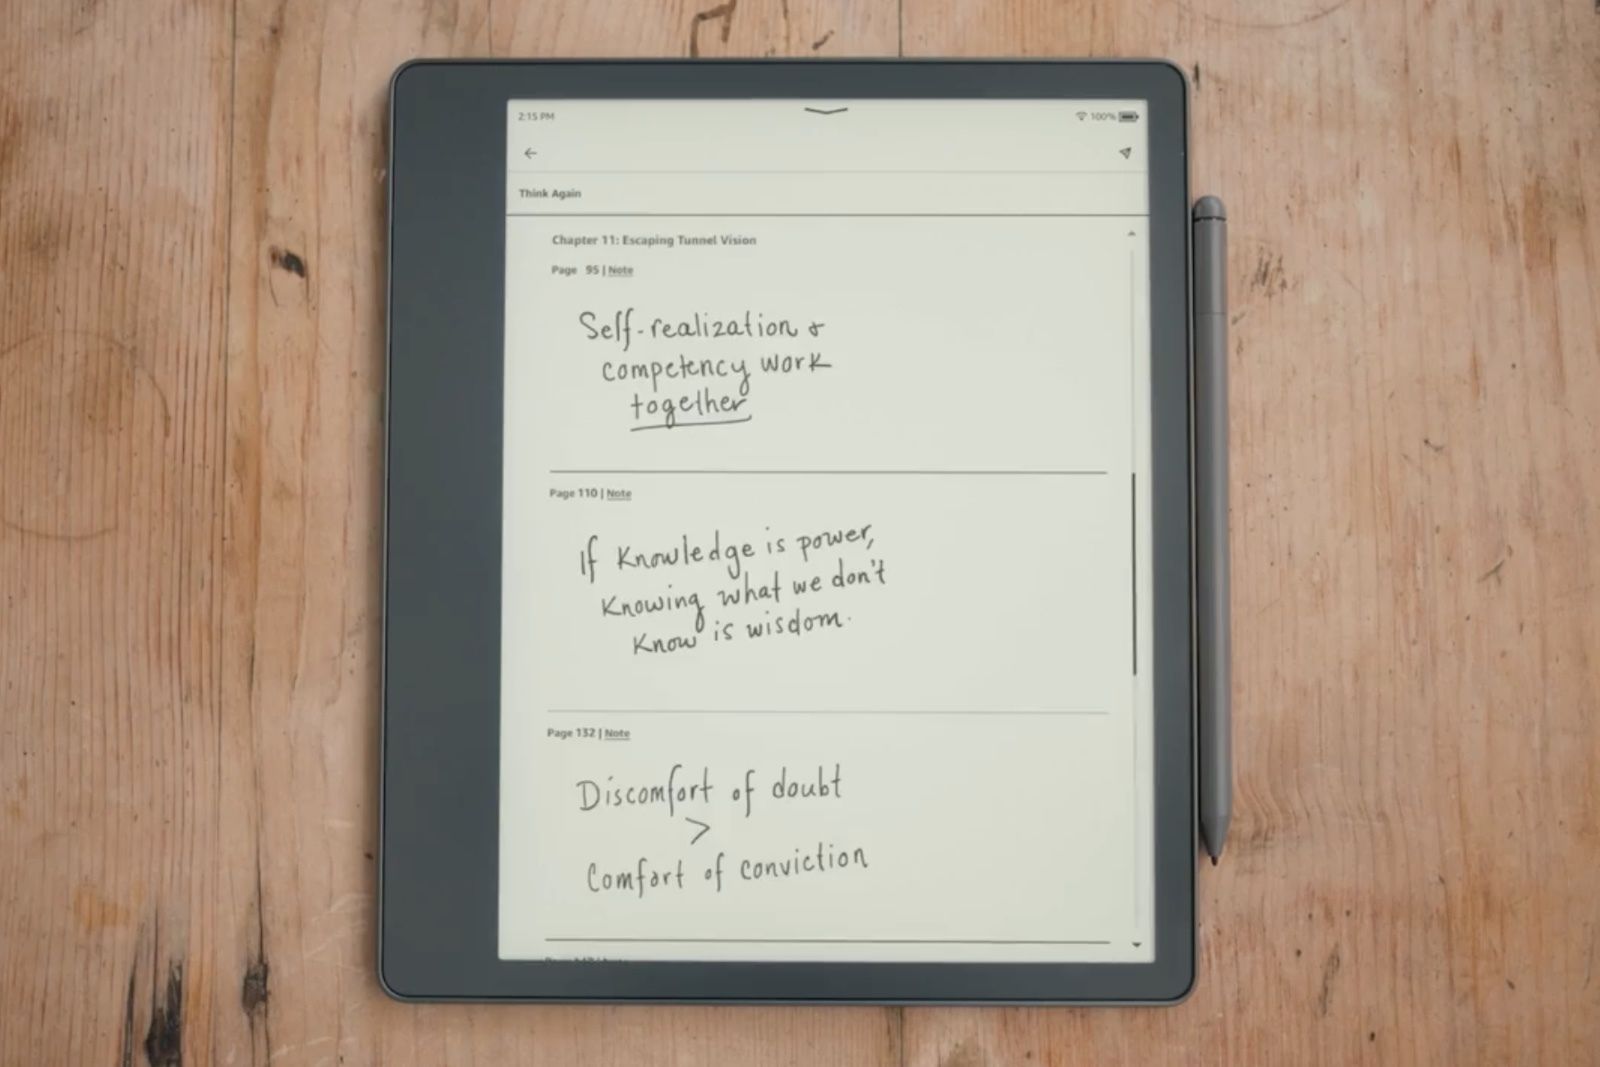
An inventory of your entire notes, together with highlights, notes added to highlights, handwritten notes or typed-out ideas, will then present up in a single, easy-to-scroll record. Every one has a hyperlink again to the precise a part of the guide the place the be aware was left. If it was created primarily based on a spotlight, you then’ll additionally see the highlighted textual content seen.

Share or export your notes
Faucet the share button within the top-right nook of the display screen to ship the notes to your Amazon electronic mail handle or one other electronic mail handle of your selecting. Viewing notes left on a doc works the identical approach, full with a sticky be aware icon while you share the doc to let the individual know the place you left the be aware.

The dangerous half about exporting your notes? You’ll be able to solely see the web page of the guide the be aware was created on, and that web page quantity will undoubtedly change primarily based on which system the individual is studying the guide on.

Amazon Kindle Scribe
$240 $340 Save $100
Wish to know extra?
We’ve lots extra Kindle Scribe tips and tricks, when you’re searching for that sort of factor.
Trending Merchandise